
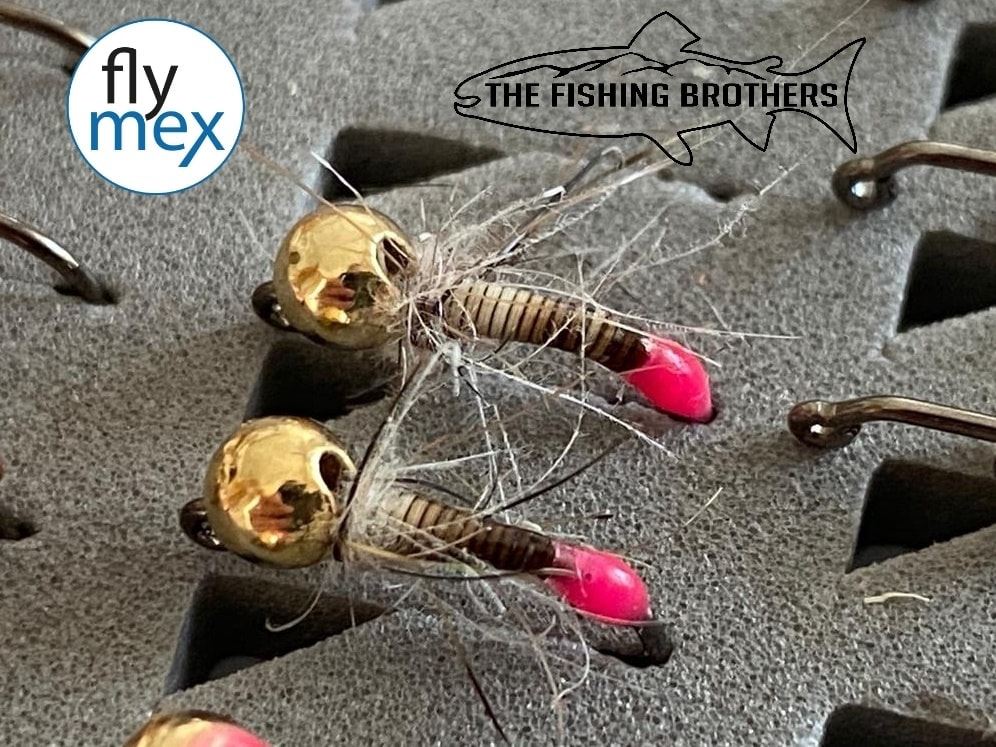
TFB Peccary Nymph Jig
Istruzioni di montaggio per una ninfa jig in peccary
Bindeanleitung für eine Jig Nympfe mit Peccary Körper
Tying instruction for a jig nymph with peccary body


Materiali:
-Amo jig
-Pallina in tungsteno
-Peccary (colore naturale)
-Dubbing per il collarino (misto coniglio cdc)
-Colla UV (trasparente e rosa)
-Filo di montaggio
Le misure di ami e tungsteno possono chiaramente variare in funzione delle proprie necessità di pesca così come anche i colori del tungsteno e del la colla uv
Step 1:
Dopo aver inserito la pallina di tungsteno serrare l’amo sul morsetto e mettere il filo di montaggio modellando già in parte il corpo conico
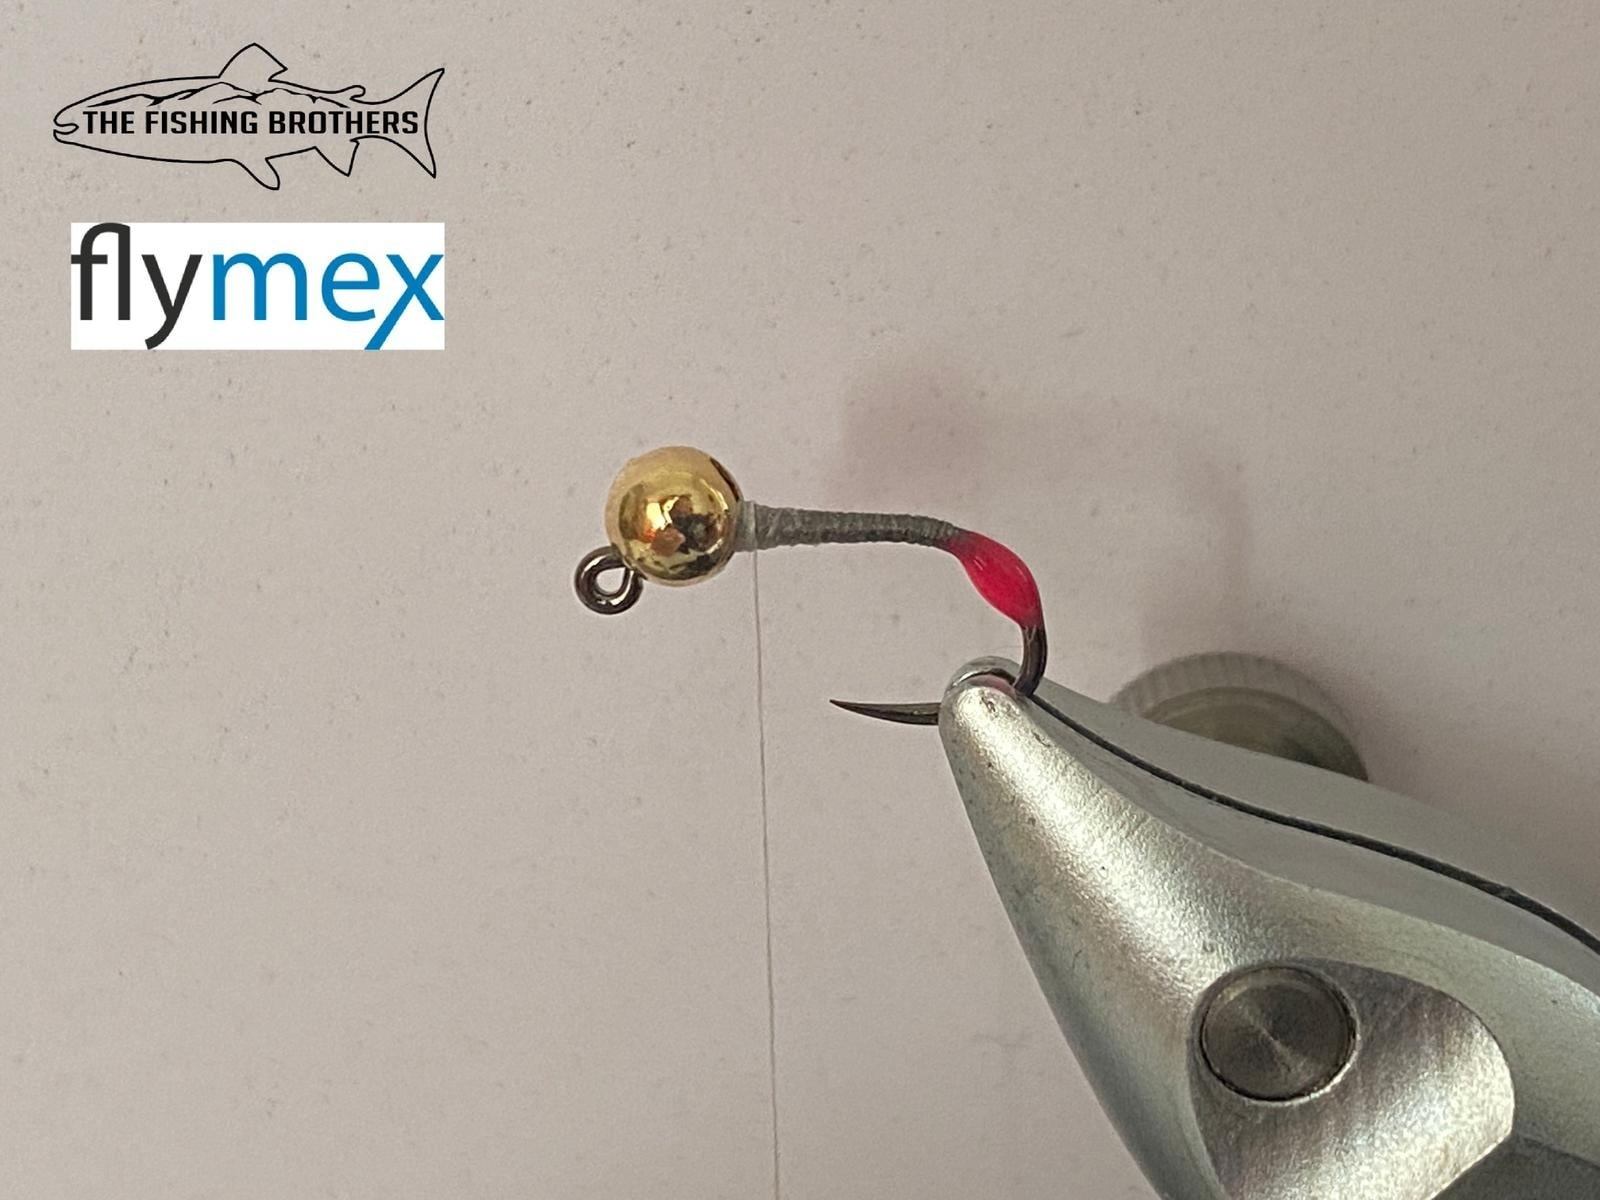
Step 2:
Apporre uno spot colorato di resina uv (in questo caso rosa ma si possono usare anche altri colori) appena dopo l’inizio della curvatura dell’amo, in alternativa lo spot può essere fatto anche in floss e ricoperto poi di resina in un secondo momento
Step 3:
Aggiungere un pelo di peccary appena dietro lo spot uv, facendo attenzione a fissare bene il pelo dalla parte della punta in modo da dare naturalmente conicità alla mosca con l’ingrossarsi del pelo, riportando il filo di montaggio in testa al termine dell’operazione
Step 4:
Avvolgere a spire serrate il peccary e fissarlo con il filo di montaggio in prossimità della pallina di tungsteno
Step 5:
Apporre al corpo una copertura di resina uv che servirà a dare lucentezza e ad evitare l’eccessivo logoramento del pelo di peccary portandolo ad eventuali rotture (durante questo passaggio si resina anche il tag nel caso fosse fatto in floss e non uv come nel nostro caso)
Step 6:
Cerare il filo di montaggio e apporre su di esso il dubbing per il collarino (noi qui usiamo un misto di coniglio con alcune fibre di cdc)
Step 7:
Montare il collarino e serrare con un classico nodo di chiusura il filo di montaggio (per serrare al meglio il filo si può anche usare un pochino di head cement ma non è necessario se si ripete e sovrappone il nodo 2-3 volte questo reggerà senza problemi) tagliare il filo di montaggio e la mosca è pronta.
Nel caso vi fosse la necessità è possibile anche appesantire la ninfa con del filo di piombo/tungsteno, questo verrà legato all’amo prima di apporre il filo di montaggio in modo da essere coperto dallo stesso in fase di modellazione del corpo
Materialien:
-Jig Haken
-Tungsten perle
-Peccary (natürliche Farbe)
-Dubbing für den collar (Mixed Rabbit CDC)
-UV-Kleber (klar und pink)
-Montagefaden
Die Maße von Haken und Perlen sowie die Farben des Tags und der perlen Selbs können je nach den eigenen Angelbedürfnissen und Geschmack geändert werden
Schritt 1:
Die Tungsten Perle aufziehen und den Haken im Bindestock fixieren, den montagefaden auflegen und einen konischen Körper modellieren
Schritt 2:
Unmittelbar nach Beginn der Hakenkurve einen farbigen UV-kleber Tag auftragen (in diesem Fall Pink, es können aber auch andere Farben verwendet werden). Alternativ kann der Tag auch mit Floss hergestellt und zu einem späteren Zeitpunkt mit klarem UV-Kleber bedeckt werden
Schritt 3:
Ein Peccary Haar direkt hinter dem UV-Tag einbinden und darauf achten dass das Haar gut mit der spitze vorraus fixiert ist, um die Fliege mit der Verdickung des Haares auf natürliche Weise den Körper zu formen. Den Montagefaden am Ende des Vorgangs bis an die Tungsten Perle vorwickeln
Schritt 4:
Das Peccary dicht bis zur Perle wickeln und mit dem Montagefaden fixieren
Schritt 5:
Den kompletten Körper mit Klarem UV-Kleber überziehen, dies verleiht der Nymphe Glanz und schützt das Peccary haar vor Brüchen (falls der farbige Tag mit Floss gemacht wird auch diesen nun mit dem UV-Kleber überziehen)
Schritt 6:
De montagefaden Wachsen und das dubbing darauf aufzwirbeln (hier verwenden wir eine Mischung aus Kaninchen mit einigen CDC Fasern)
Schritt 7:
Den Kragen einbinden und am Ende mit einem klassischen Abschlussknoten den Montagefaden fixieren (zum besseren Halt kann hier auch ein wenig Head Cement genutzt werden ist aber nicht zwingend notwendig, den Knoten einfach 2-3 mahl wiederholen und alles ist bomben fest) Montagefaden nun Abtrennen und die Fliege ist fertig.
Bei Bedarf ist es auch möglich, die Nymphe mit Blei Tungstendraht zu beschweren. Dieser wird vor dem Anbringen des Montagefadens am Haken befestigt, um während der Körpermodellierungsphase von diesem abgedeckt zu werden.
Materials:
-Jig Hook
-Tungsten bead
-Peccary (natural colour)
-Dubbing for the collar (mixed rabbit cdc)
-UV resin (clear and pink)
-Tying thread
The measurements of hooks and tungsten can clearly vary according to your fishing needs as well as the colours of the tungsten and the UV resin
Step 1:
After inserting the tungsten bead, tighten the hook on the vise and put on the tying thread already partially modelling the conical body
Step 2:
Apply a coloured spot of UV resin (in this case pink but other colours can also be used) just after the start of the hook bend, alternatively the spot can also be made in floss and then covered with resin at a later time
Step 3:
Add a hair of peccary just behind the UV spot, making sure to fix the hair well on the tip side so as to naturally taper the fly with the swelling of the hair, bring the tying thread back to the bead at the end of the operation
Step 4:
Wind the peccary in tight turns and secure it with the tying thread near the tungsten bead
Step 5:
Apply a cover of clear UV resin to the body that will give shine and avoid excessive wear of the peccary hair leading to possible breakages (during this step the tag is also covered if it was made in floss and not UV as in our case)
Step 6:
Wax the tying thread and put the dubbing for the collar on it (here we use a mixture of rabbit with some cdc fibres)
Step 7:
Wind the collar and tighten the mounting thread with a classic closing knot (to tighten the thread you can also use a little bit of head cement but it is not necessary if you repeat and overlap the knot 2-3 times this will hold up without problems ) cut the tying thread and the fly is ready.
If there is a need, it is also possible to weight the nymph with lead / tungsten wire, this will be tied to the hook before putting on the tying thread in order to be covered by it during the body modelling phase